I have outlined the steps of construction below. NOTE: You can click on any photo to see it much larger.

I purchased three concentric rings of LED lights from Amazon.com. The sizes are 140mm 120mm and 90mm from outside to inside. These rings are called "LED Car Angel Eyes Halo Rings" from Uxcell and operate on 12v of electricity. The prices were $12.55, $4.43, and $7.46 respectively. (Total price for the three = $24.44) They come pre-wired with a black/red pigtail.

Here's the Leinenkugel's Beer bucket turned upside down to show the shiny METAL side.

The 12v. AC X DC power adapter was also purchased through Amazon.com. I bought the LE Power
Adaptor, Transformers, Power Supply For 12V LED Strip Lights, 6A Max, 72W Max,
US Plug - Sold by: NEON MART for $11.99.

Notice that the Angel Eyes Halo Rings have bare metal conductors on the bottom side. This is the reason that an "insulator" must be created to fit the entire bottom of the bucket before adhering them to the bottom.

I had some random pieces of self-adhesive flooring tiles in my collection of stuff, so I chose one and traced the underside of the bucket on the backside of a tile as a pattern.

Here I am cutting the vinyl tile with a scissors along the template line.

The circle of insulating tile has now been cut out.

The backing from the self adhesive floor tile has to be pulled off.

The tile has been affixed to the bottom of the metal bucket.

I aligned each of the three LED rings onto the tile and marked a RED dot where I wanted the wiring to run through the bottom of the bucket.

This shows the three RED dots just before drilling occurs.

Drill through the tile and the bucket in each of the RED dot centers. Careful not to have the bucket spin on you! Wear eye protection and gloves.

This is a center-point bit (sometimes called a Forstner bit, or drill). It will keep the drill from wandering.

Use a diagonal pliers to cut the sides between the holes so that you end up with a long "slot" in the bucket.

With a soldering gun and flux-core solder; join the three LED's wiring together. Keep black with black and red with red.

Here's what the final junctioning of the wire looks like. You end up with ONE black and ONE red lead wire to contend with in the bottom of the bucket.

This is what the three LEDs look like, sitting on the bucket bottom; prior to the hot glue application.

With a hot glue gun; apply glue to the inside and outside of each of the three Angel Eyes Halo LED rings.

This show the bucket with all the rings glued into place.

I did a quick wiring job to the transformer to see how the lights looked...COOL!

This shows the bottom of the bucket where the black and red lead wires came through. I squirted hot glue into the opening to fill it in.

Find a large "L" bracket that the transformer can be attached to in a vertical position.
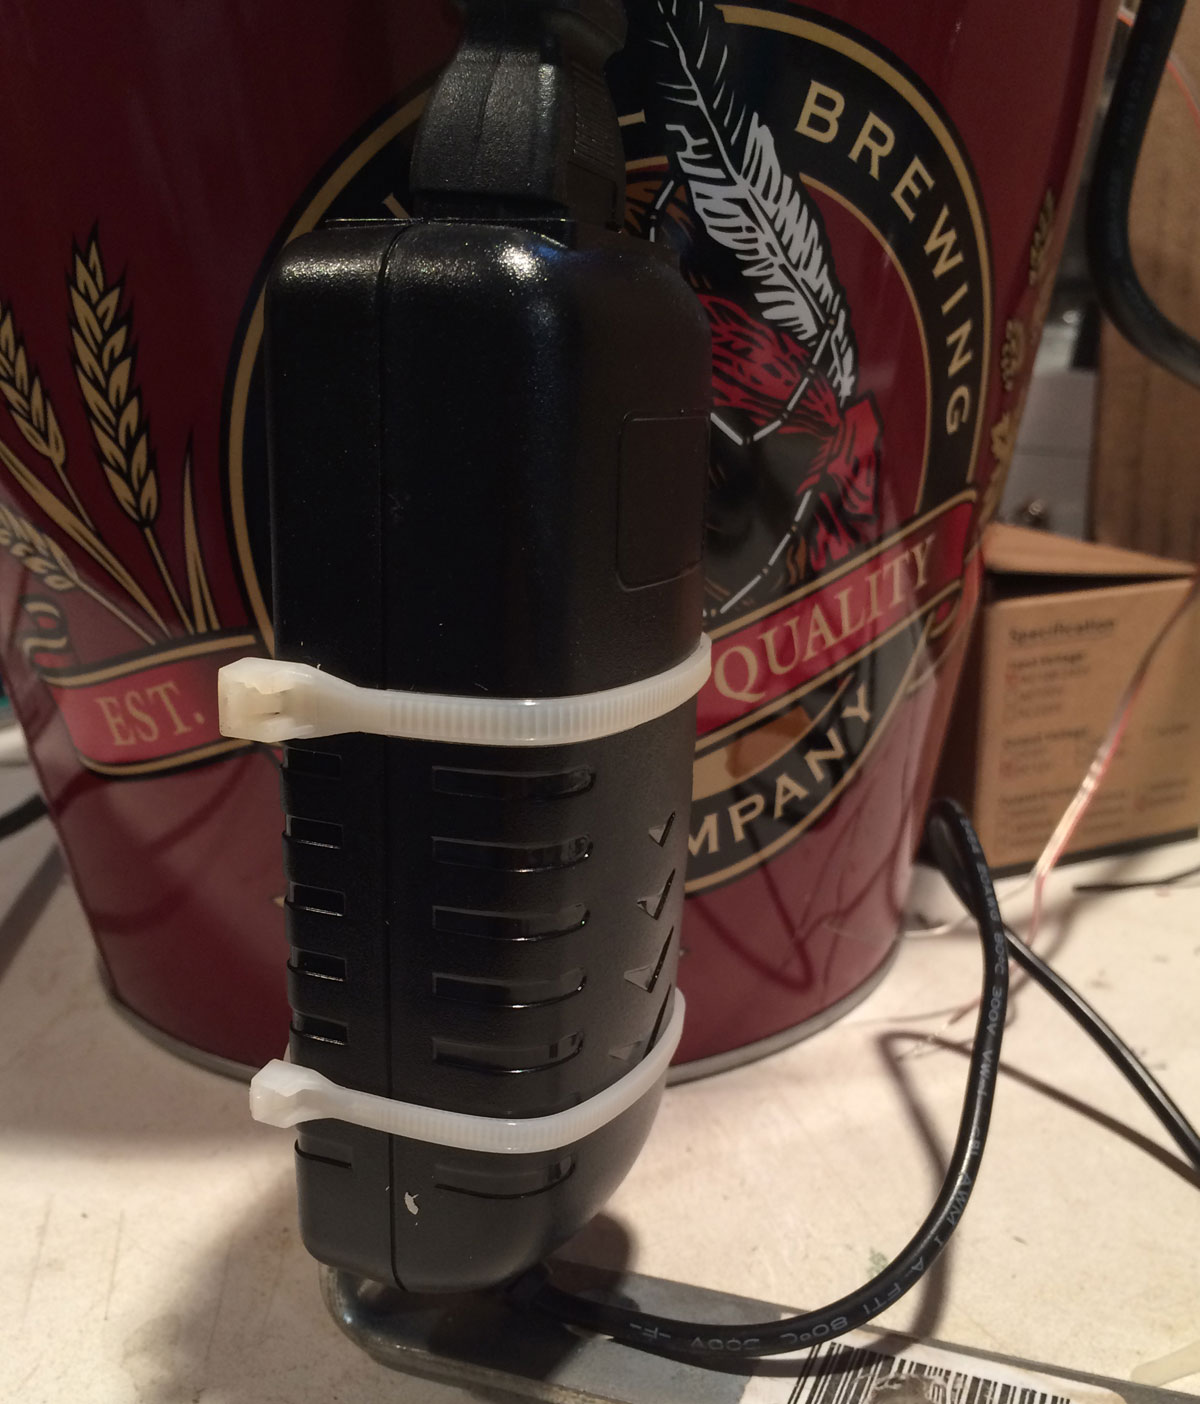
With cable ties; attach the transformer to the "L" bracket.

STOP to have a cold Leinenkugels and enjoy your creation thus far.

Use hot glue to fasten the "L" bracket to the bottom (center) of the bucket.

Run the transformer cord up and affix it to the bucket handle with a cable tie for what is called "strain relief."

I could have stopped there, but My lovely wife Barbara suggested that I put beer bottles into the bucket. I thought that was BRILLIANT and went a step further. I bought 4 (2-packs) of 40mm LED Angel Eyes Halo lights for $11.96 from Ebay to glue onto the bottom of each bottle.

Here I have hot glued the 40mm ring to the bottom of an empty Leinie's beer bottle. Repeat 7 more times.

A 6" piece of 3/4" schedule 40 PVC waterline fits perfectly in the center of the 40mm LED ring. I did this to ELEVATE each bottle off the bottom of the bucket (basically on a stalk). Again - hot glue works well here.

After wiring all the blacks and red wires together to the transformer; it looks SUPER DUPER COOL!
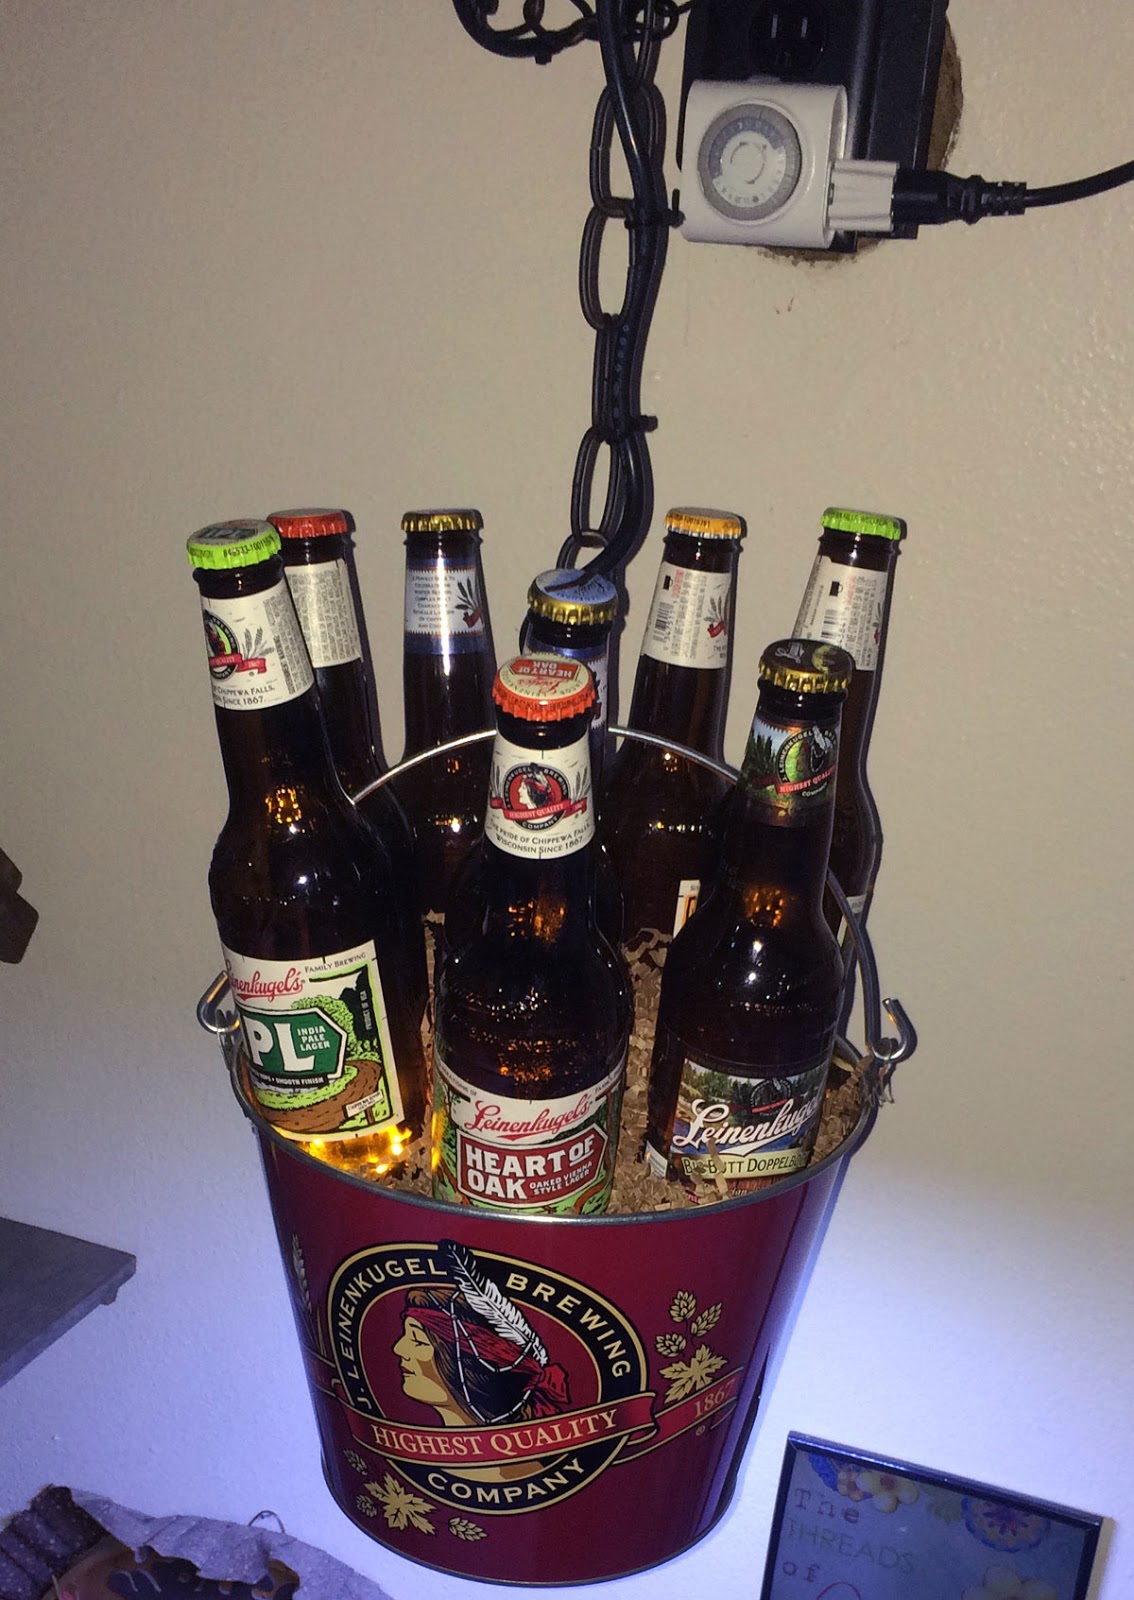
Oh, and I used some black swag lamp chain to hand the bucket (old school) from a hook and have it on a timer so that it turns on in our stairwell at dusk until 10:00 PM.

Pretty darn spiffy Eh? Total cost is around $40.00 plus the bucket.
Pure GENIUS!
No comments:
Post a Comment